7/12/2009
How to Use Your Camera's Image Stabilization Effectively
Image stabilization technology in cameras and in lenses has revolutionized digital photography, enabling photographers to get dramatically sharper photos without hauling around a tripod. But it's not obvious how to use a digital SLR's image-stabilized lens--after all, the very fact that it has an on/off switch implies you shouldn't leave the feature on all the time. For a refresher on lens basics, check out "Demystifying Lenses," and then join me as I explain how to get the most out of your image stabilization technology.
What Is Image Stabilization?
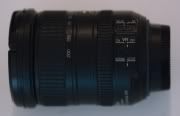
When shopping for lenses for your digital SLR, you might have noticed that image stabilization goes by a few different names, most commonly either IS (among Canon lenses) or VR (for Nikon). But the lenses all tend to work the same way: Motion sensors in the lens generate feedback that directs optical elements to compensate for small movements, like the sort that occur when you hold a camera.
Of course, some cameras have image stabilization built into the body instead of the lens. If you have such a camera, the basic idea is the same. The key difference is that the motion sensors direct the camera's sensor rather than optics in the lens. The advantage is that you need to buy the expensive stabilization hardware only once, instead of in each and every lens.
When to Use Image Stabilization
Sounds great, right? You might be tempted to leave something like that on all the time. In reality, these motion sensors are a little too sensitive for 24/7 operation. If you mount a camera with image stabilization on a tripod or secure it to some other form of stable support, then you should generally flick the switch to off. (There should be a switch for image stabilization somewhere on the IS or VR lens, or, if it's built into the camera, somewhere on the body.)
What happens of you don't? The sensors tend to interpret artifacts in the sensor's data (like digital noise) as motion, and send instructions to the sensor to compensate. This produces an effect sometimes called ghost motion. The result is that the image stabilization system introduces motion blur into a photo that would otherwise have been as sharp as a tack.
So the bottom line is that you should turn image stabilization off when shooting with a tripod, but leave it on the rest of the time. You can tell when image stabilization is doing its job when you depress the shutter release halfway; the viewfinder image should tend to "freeze" as the system dampens the normal jitters of your body.
Disable One Axis

You might be able to exert even more control over your image-stabilized lens besides just turning it on or off. Some lenses have Active and Normal modes, like on my Nikon 18-200mm zoom.
Active is a good all-around setting for counteracting ordinary jiggles both vertically and horizontally. If you're trying to pan a moving subject, though, you'd want to switch to Normal mode, which compensates for vertical vibration while allowing for the kind of side-to-side motion you are trying to capture. Various lenses are marked differently, so check your user guide for details about the lingo on your particular lens.
0 comments:
Post a Comment